06 Jun Creating a Snapshot From a Script File
A database snapshot can be created in one of two ways:
To create a snapshot from a database script follow these steps:
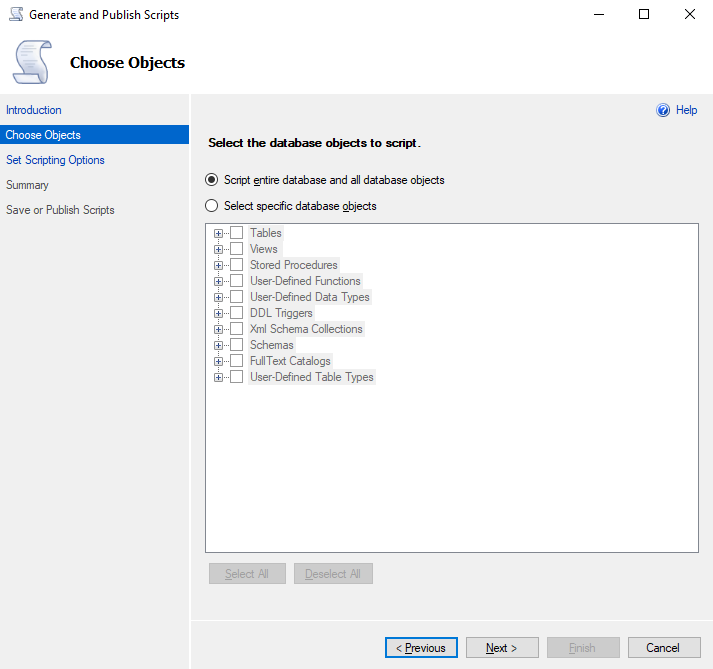
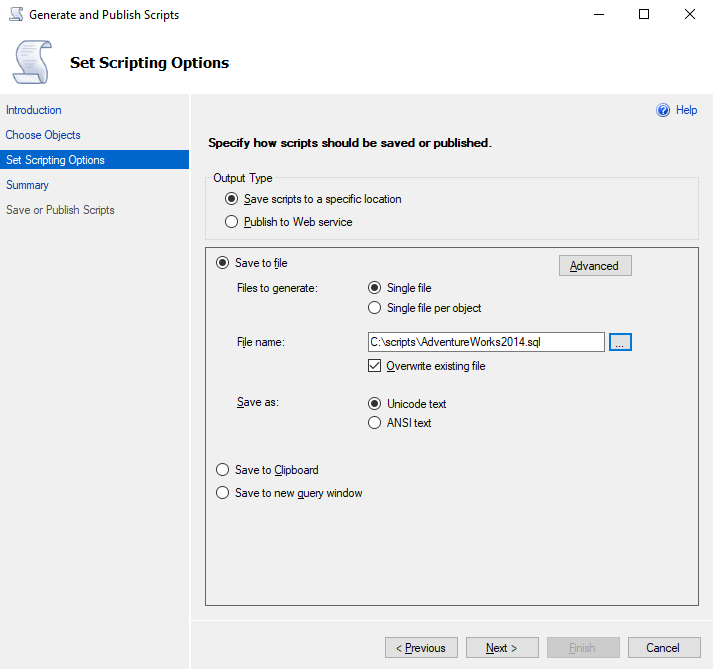
1) First create a CREATE script for all objects in the database (this can be done though SSMS by right clicking on the database and selecting Tasks > Generate Scripts..)
2) From the quick access menu
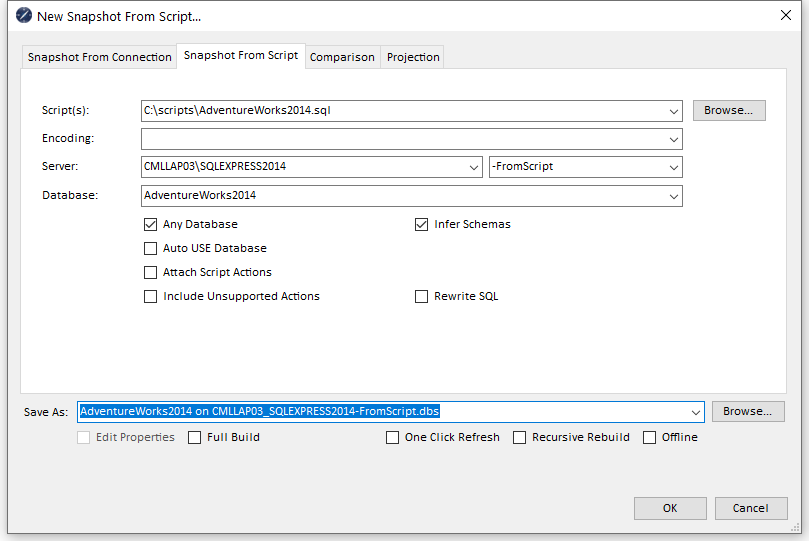
3) Ensure the second tab (Snapshot From Script) is selected
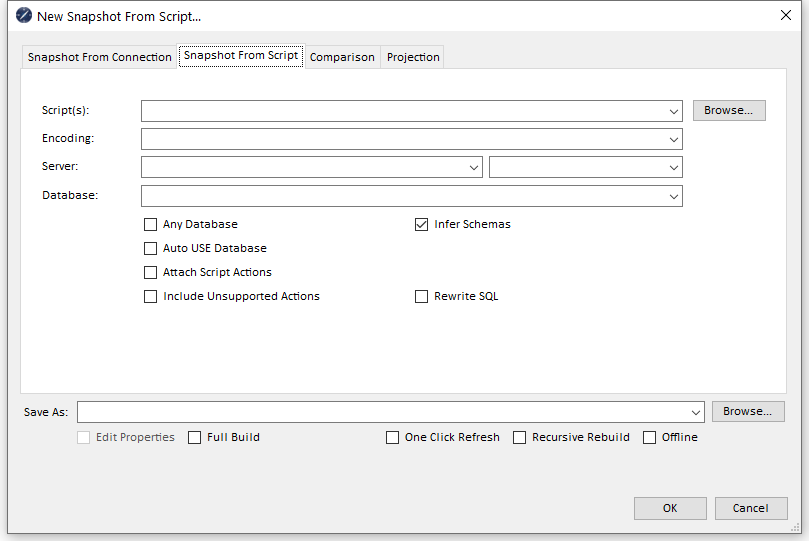
4) In the Script dropdown enter the path to the script file or browse to this file if you prefer
5) Leave the Encoding value blank to use a default encoding which usually works
6) In the Server dropdown enter a descriptive the name for SQL Server instance or select from a history list (It is a good idea to use the actual name of the server where the script was generated)
7) In the Suffix dowpdown (to the right of the Server dropdown) enter ‘-FromScript’. The suffix will be appended after the server name in the suggested filename and is optional
8) In the Database dropdown enter a descriptive database name or select from a historic list (again it is a good idea to use the actual name of the database which has been scripted)
9) Check Any Database and Infer Schemas
10) Leave other checkboxes (Auto USE Database, Attach Script Actions, Include Unsupported Actions, Rewrite SQL) unchecked
11) Select a suggested filename for the snapshot from the Save As dropdown (or type a name if you prefer)
12) Leave Full Build, One Click Refresh, Recursive Build and Offline unchecked
13) Select a filename suggestion from the Save As dropdown (or type a filename if you prefer) and Click OK (You may be prompted for a folder location if none has been specified)
The snapshot will be created by analysing the SQL contained in the script, creating, altering and dropping objects in the virtual schema which is then saved in a single file.
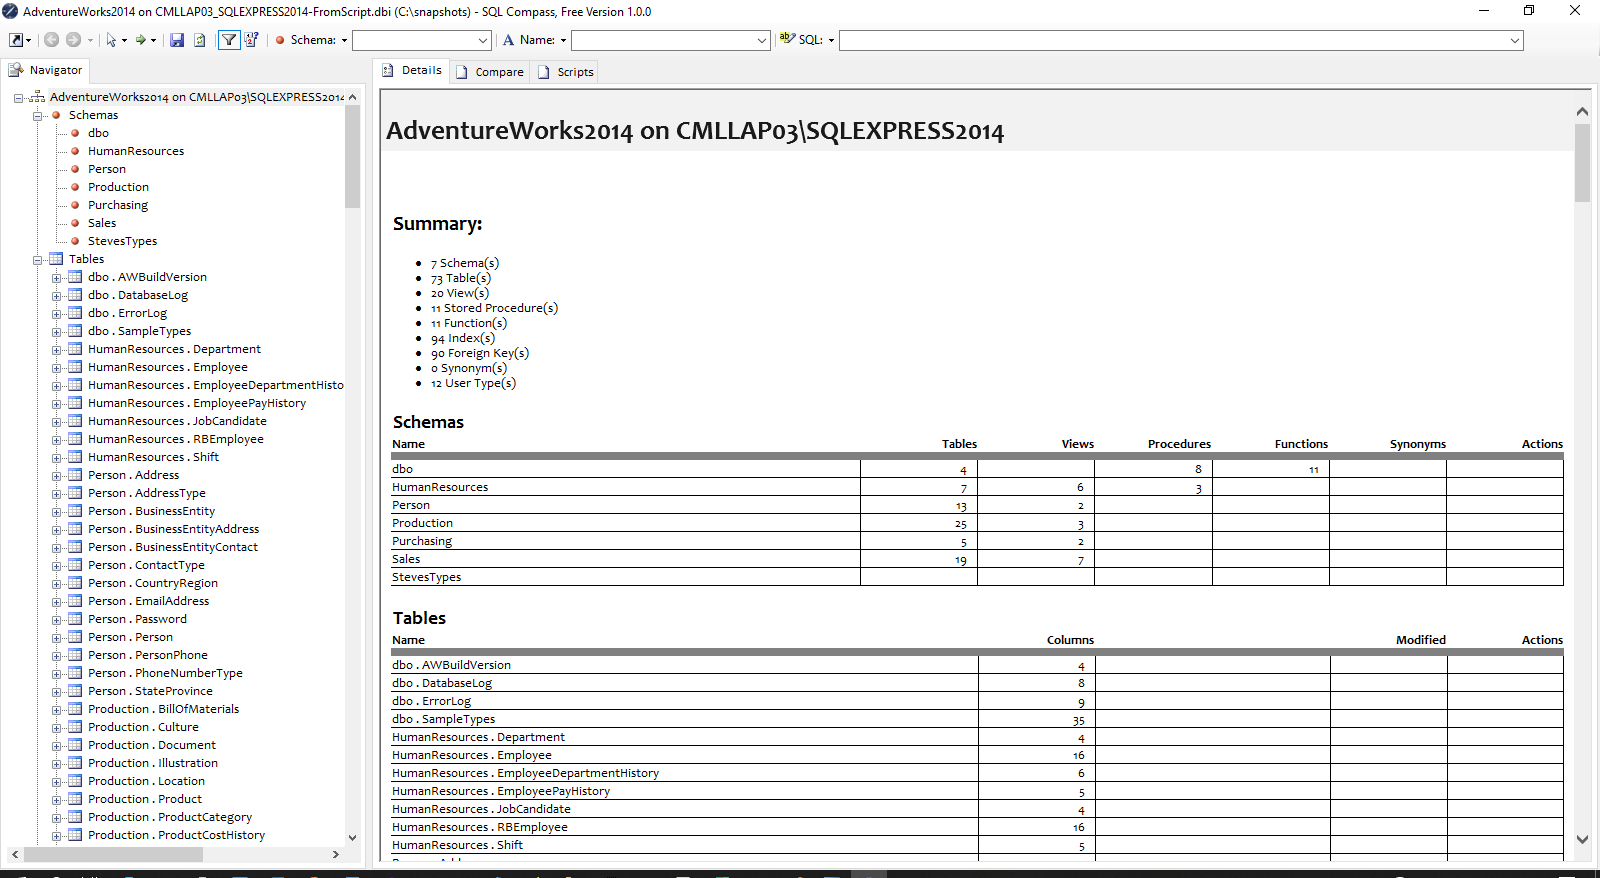
This file can then be shared with other users of SQLCompass, allowing them to inspect and analyse the database schema with no requirement to be connected to the database or even a network.
So, let’s take a closer look at those options:
Script(s)
- Enter the path to a file or files containing the script(s) to be processed to create the snapshot. ‘#’ may be used as a wildcard to match all files in a folder (similar to ‘*’ in general use) and ‘##’ may be used to match all files in a folder or subfolder.
Encoding
- Specifies the encoding which was used when generating the script . If left blank then a default encoding of Windows-1252 (CP-1252) will be used which generally works in most cases. You may need to specify a different encoding if characters are displayed incorrectly in your snapshot
Server
- Should contain a descriptive name of the server instance from which the script originated
- Its a good idea to enter the named used to access the server instance here, but you can use any name to describe the server, e.g. PRODUCTION, QA etc.
Database
- Should contain a descriptive name of the database from which the script originated
- Again its a good idea to enter the exact name of the database, but you can use any name
- Also this name can be relevant when the Any Database checkbox is unchecked
Any Database
- When checked, all script fragments will be parsed and will contribute to the snapshot
- When unchecked, script fragments will only be processed where preceded by a USE statement which matches the database name specified
- This allows scripts referencing multiple database to be properly processed into multiple snapshots if required
Auto USE Database
- When checked, all script fragments will be parsed and will contribute to the snapshot unless preceded by a USE statement which references a different database to that specified for the snapshot
- Use of this option is discouraged and it may well be removed in the future
Attach Script Actions
- When checked, a collection of all parsed script actions contributing to the snapshot is retained as part of the snapshot
- As a result, all the actions leading to an object’s state can be listed against that object (e.g. a table which has been created through a CREATE TABLE fragment followed by several ALTER TABLE fragments in the processed script(s) which will detail the exact fragments alongside the final table structure)
- This can be very useful for debugging SQL error causes
- Generally it is recommended that this option be unchecked except where specifically required as it greatly increases the size of the snapshot
Include Unsupported Actions
- Many script fragments are unrecognised by SQLCompass (e.g. SET ANSI NULLS…) and these unsupported actions will be ignored during parsing
- Checking this option will include these unsupported fragments in the attached script actions
- Generally it is recommended that this option be unchecked except where specifically required as it greatly increases the size of the snapshot
Infer Schemas
- When checked, schemas will not be directly analysed but will be inferred from the schemas of analysed objects (as a result, empty schemas containing no objects will be omitted)
- When unchecked, schemas will be explicitly analysed from the database connection (this is generally discouraged and may lead to unexpected schemas being listed)
Rewrite SQL
- When checked, causes database object definitions to be rewritten in a standardised form
- This is a useful option to enable when comparing database snapshots, as trivial differences in the definition SQL can lead to undesired false positives (e.g. a datatype of [int] compared to INT will show as a difference when syntactically they are equivalent)
Full Build, On Click Refresh, Recursive Build, Offline
- These options are related to rebuilding of a snapshot rather than initial creation and will be covered in other articles
Just started working with or interested in learning about how SQL works? Click here.